|
FLITE-METAL APPLICATION:
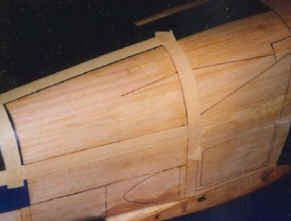
After panel lines are drawn, you are ready to begin applying  © . © .
Using 1/4 and 1/8th inch wide 3M
Fine Line©
tape,
(not 3M Painters Tape) apply
a single
strip per side to the "outside" of a "single panel's" perimeter. On tight curves use
the narrowest width tape for best results. Remember, you are covering a
plane one panel at a time. ©
is applied without any additional finishing process or it can be sanded to a super
smooth natural or polished to a mirror finish.
For the ultimate realistic "0 inch" look of the real thing sand © surface with
400 wet/dry
prior to
application to surface. Lay ©
on a smooth piece of 1/4 inch thick aluminum plate. 3M Painters
Tape©
is used on each end of the length of ©
to keep it from slipping during sanding.
Wrap 1/8th inch smooth neoprene rubber around hardwood sanding block then
affix 400 grit wet/dry to it to permit a firm non-marring sanding tool. Be
sure to sand ©
surface in a single direction. This process will result in a work hardened smooth
surface in only a few minutes. Change to 600 grit wet/dry for a few minutes
before finish sanding with 1000 grit wet/dry.
When satisfied with surface texture, clean black residue from ©
with
a clean damp cloth. If
you desire a polished surface, polish ©
with aluminum metal polish to a mirror finish
prior to removing from the
aluminum plate. Be sure aluminum residue does not
contact uncovered surface. Remove ©
from aluminum plate before cutting just larger than
perimeter of taped panel perimeter.
Click
here
to learn how to identify largest ©
contact patch on the to be covered panel. This can reduce the application
time while achieving the best finish.
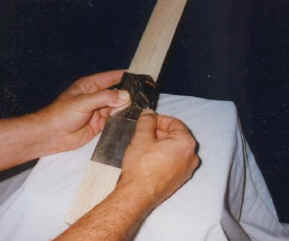
Peel backing from the cut piece of ©
and align with panel perimeter shape. Apply pressure with your index finger
to surface of ©
along line identified as that of the largest contact patch. Using side of
fibrous burnishing tool, burnish aluminum outward at
right angles
to contact patch line. This can result in the smoothest and unwrinkled
panel. After burnishing beyond perimeter of panel half, burnish opposite
side of panel.
This application method permits the aluminum to conform naturally to the
surface with the least amount of stretch. This helps eliminate wrinkles that
would be caused by pulling and tugging on the perimeter during application.
Wait to do all
touch-up polishing or sanding until entire airframe has been covered
to prevent contaminating uncovered airframe surface.
Before continuing click here
to read the flush panel (butt seam) application directions.
Apply ©
in
1/32nd of an inch overlapping sections beginning at the bottom rear of the surface being
covered.
Wing &
Horizontal Stabilizer:
Start on the bottom rear at the trailing edge working in and forward.
Fuselage:
Bottom first, then sides finishing with top. Overlap the panel seam 1/32
of an inch.
This "shingle-method" of application creates the panel line and prevents
fuel oil residue from migrating.
Cut aluminum larger than
desired panel shape with sharp scissors . Peel off backing, align with
largest contact patch and apply per the above directions.
 |
|
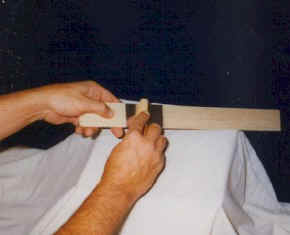
Example #1. Burnish onto
surface with fibrous pressure tool. Start from
panel center working out to
eliminate air bubbles. If air bubbles occur pop with a pin and burnish down. Trim
off excess aluminum with hobby knife (remember to use only enough pressure to cut
through top layer of aluminum of the 1/32 inch overlap). |
 |
|
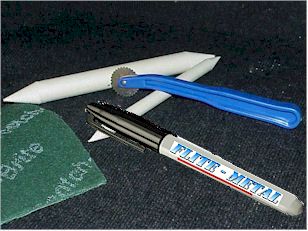
Example #2. (Use
the fibrous pressure tool for surface with rivets or panel lines built-in.)
©
is dead soft
and will stretch around curves.
|
|